

Hi all,
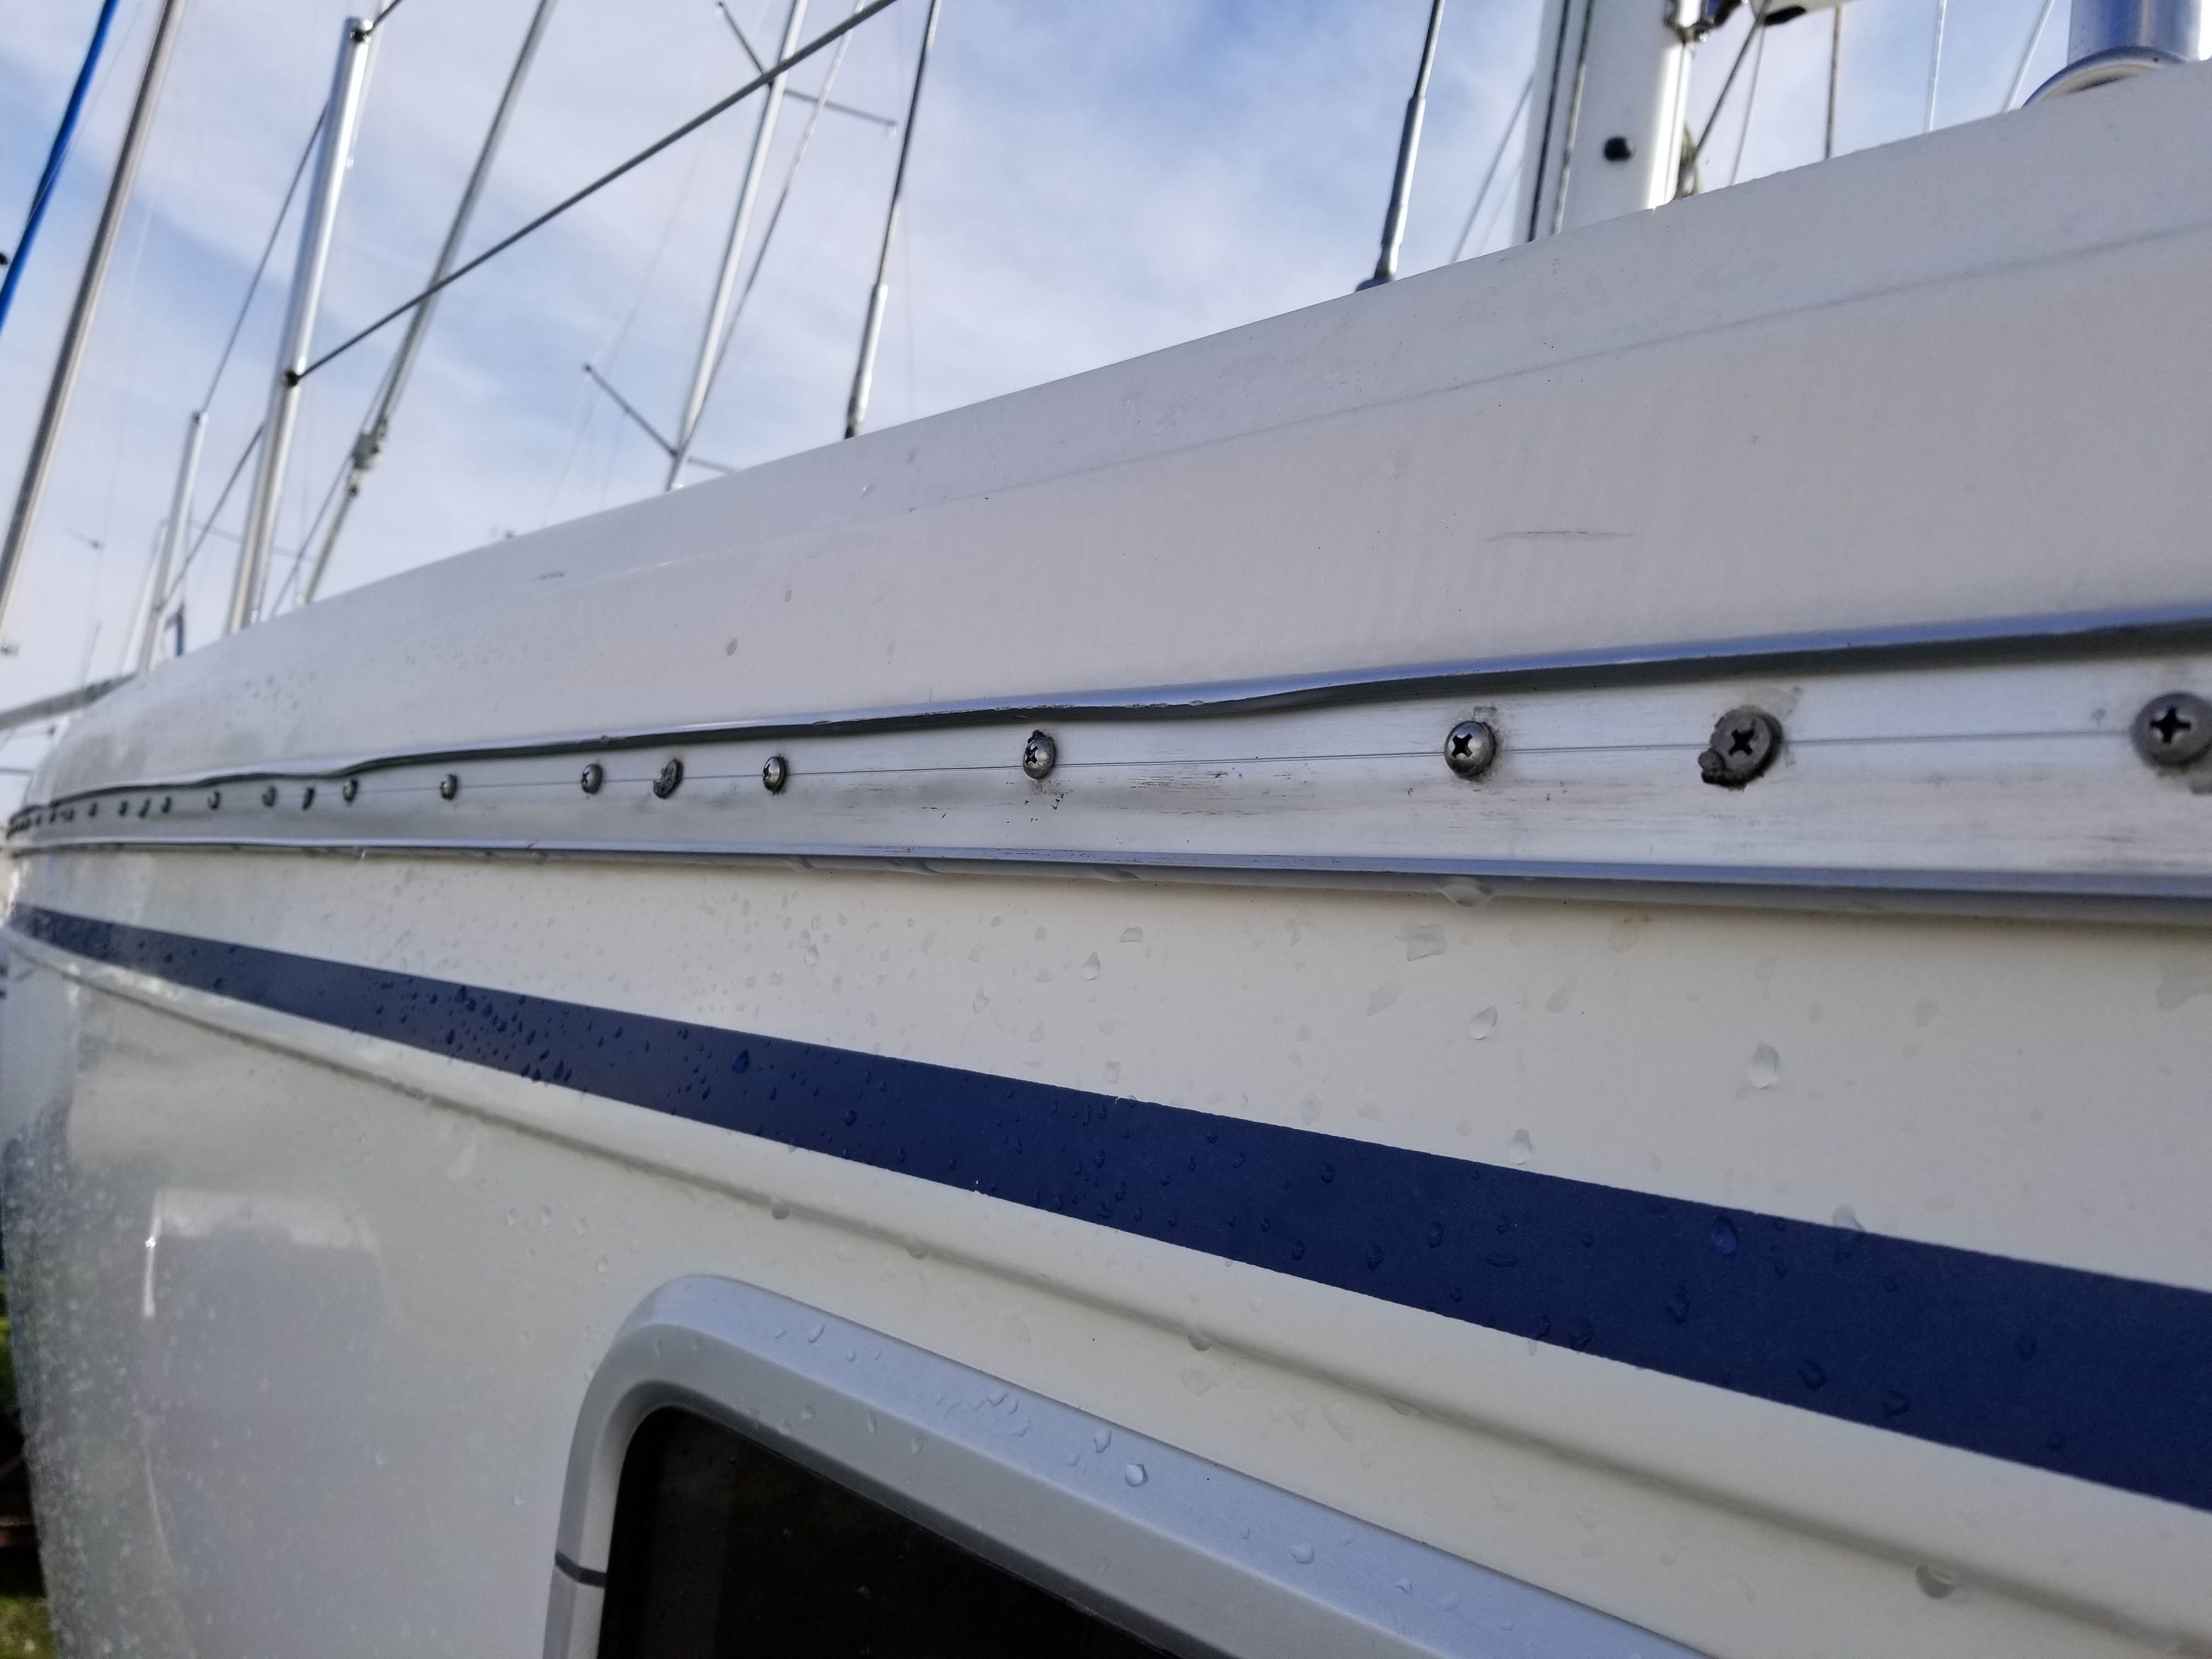
I am attempting to replace my rub rail that has sustained a lot of damage from a PO, either multiple docking incidents or one really bad one. Unfortunately I can not just replace the rubber insert - I also need to fix the aluminum extrusion as well, which is dented in multiple locations on one side (see photo). I did buy both the rubber insert as well as a 6.5' section of extrusion from CD, so I have the parts.
I read through everything I could find on the forum related to this job, but some of the info seems to be conflicting and I'm not sure what to expect. One person suggested that you could just knock out any dents that were present in the existing rail, but I would have to disagree that this is possible. I have attempted to do this, and I believe that I have a better chance of ripping out the screws holding the rail to the boat than I do of straightening the rail itself. This leads me to believe that I have to remove the damaged section of the rail altogether and replace it. I read in a post from quite some time ago (and I haven't been able to find it again), that someone else attempted to do this and found the through-bolts impossible to remove due to access to the nuts from the inside (if I remember correctly), and they ultimately ended up cutting around the through-bolts with a hole saw and leaving them in place, then drilled larger holes in the new rail to slip over top of the through-bolts. It's possible that I read this elsewhere, but I thought it was on this forum.
I'm curious if anyone has removed the aluminum rub rail, how difficult it was, and were you able to remove the through-bolts to do so?
Thanks,
Don
Don Lincoln
"Nancy Lynn"
1993 Catalina MK1.5, Hull 1238
LaSalle, MI (Lake Erie)
Universal M-35AC
Don-
I replaced 11' of aluminum rub rail. PO had impacted hard enough to deform the aluminum extrusion. I was able to back out the screws and removed the through bolts without any issues. The nuts for the through bolts are accessed behind the wooden valance located in the cabin under the deck. I used a 4" grinding wheel to cut the original rail square to butt up with the new rail. I removed a few extra screws beyond where the cut was to be made allowing the rail to be gently pulled away from the hull. I then slid a piece of wood behind so the grinding wheel would not damage the hull as the cutoff was made. I used tape applied above the existing rail and marked the through bolt and screw locations. I held the new rail in place, looking to align the holes with the existing hole marks. The fastening holes in the new rail did not align with the all the existing holes, but I was able to use some and drilled a few new. I used 4200 to seal/bed each bolt and screw. Once complete, I inserted new rub rail on the whole boat as it was tired looking and I had purchased a full roll (really helps to do the rail inserting in the hot sun as the rubber becomes very flexible and easy to work with). A screen roller wheel made the insertion of the rubber into the rail a breeze.
Bob
2002 36 MK II TR, WK, FM
Bob & Kim Kissel
s/v "Full Circle"
2002 36 MKII Hull# 2084
Wing Keel, Tall Rig, In Mast Furling, M-35B
Lake Michigan
Screen roller wheel! What a great idea. I'll be tackling this job sometime this summer so looking for any advice or shortcuts. I wish there were better color choices available for the rubrail - tan or gray... boring.
Jeff D
Island Time
'84 MK-I SR/FK #273
Kemah, TX
Bob, thank you so much for the reply. This is extremely helpful. I will follow your procedure and give it a go.
Thanks!
Don
Sent from my SM-G950U using Tapatalk
Don Lincoln
"Nancy Lynn"
1993 Catalina MK1.5, Hull 1238
LaSalle, MI (Lake Erie)
Universal M-35AC
Don make sure you re use or at least seal all of the existing screw holes. Last year was our first full season for Slip Away. PO had repaired or replaced the forward 8 - 10' of our aluminum rail. We noticed in heavy waves our clothes hanging in forward locker were wet on bottom. Never seemed to be much water but enough to know something was going on. Spent much time taping paper towels all over trying to identify where water was coming from. Found water and sand under the drawers in v birth which told me was lake water not freshwater leak. We finally tore forward cabin apart at the seams and exposed as much as we could and went at the topside w a hose. Found nothing until I told her to spray up under the rub rail. Immediatly had water dripping from tips of the screws holding the rub rail on. When boat yard removed he said that whoever did repair drilled all new holes and never sealed the old holes in any way. They did however try to silicone the gap btw hull and bottom of rub rail. I have yet to get back on the water but she is floating at the dock as of this past Mon so we will find out soon enough! Good luck and Happy boating!
Mike and Nikki Willis
1996 C 36 #1570 "Slip Away"
MK II - Tall Rig - Winged Keel
Fremont, Ohio
I finished the job this weekend. None of the holes lined up with the new extrusion, so I ended up filling them with epoxy and then drilling new holes. I also sealed all of the fasteners with 4200. Yesterday was cold-ish with no sun, so the rubber insert was very difficult to press into place. But it's done now and looks fantastic. Much appreciation for all the great tips and advice!
Sent from my SM-G950U using Tapatalk
Don Lincoln
"Nancy Lynn"
1993 Catalina MK1.5, Hull 1238
LaSalle, MI (Lake Erie)
Universal M-35AC
Don,
How did you end up getting the old rail off? I have to replace a 6.5’ section on Shadowfax(1983 #86) and I can only get to 3 of the thru bolts, without tearing out the backs of the port side bookshelves. Did you end up cutting around the bolts as you initially mentioned?
Thanks, Rob
I replaced about 2' of rub rail last year. There were two through bolts I couldn't manage to remove, and I used the technique of cutting a couple of holes in the replacement extrusion to fit over those bolt heads. Some self-tapping screws were used to supplement re-affixing the extrusion, plus plenty of adhesive.
Matthew Chachère
s/v ¡Que Chévere!
(Formerly 1985 C36 MKI #466 tall rig fin keel M25)
2006 Catalina Morgan 440 #30.
Homeported in eastern Long Island, NY
Rob,
I didn't have to cut any of the bolts. I was able to access all of the nuts behind trim pieces that run along the underside of the side decks, and nothing was frozen or corroded so they came off easily. I think my setup is different than yours because I don't have shelves on the port side, I've got a port. You should be aware that the holes in your new extrusion sections are not going to line up at all with the screw/bolt locations in your existing extrusion. I had to epoxy all of the old holes and drill new ones to match the new extrusion. It wasn't hard, but the point is that one way or another you're going to have to get to those nuts on the inside. I have attached a couple of pictures to give you a better idea.
Thanks,
Don
Don Lincoln
"Nancy Lynn"
1993 Catalina MK1.5, Hull 1238
LaSalle, MI (Lake Erie)
Universal M-35AC
I found this when I got back to the boat this weekend. A bad storm destroyed a section of my rub rail and extrusion. Where did you get your extrusion and rub rail? Catalina Direct or Catalina Yachts? Catalina Direct doesn't list one for the 36
Jay
I got mine from Catalina Direct. Screenshot attached.
Don Lincoln
"Nancy Lynn"
1993 Catalina MK1.5, Hull 1238
LaSalle, MI (Lake Erie)
Universal M-35AC
I got 2 replacement sections of aluminium extrusion and also a complete plastic rub rail from Catalina Direct. The extrusion was shipped in a pvc tube and the service was excellent as received it all in Australia in about 7 days. I was pleased to find that they had included both a roller and a pressing tool with the rub rail to assist insert of the plastic.
Peter Taylor Melbourne Australia. Altair #2227 2005 C36 Mk11