

Week or 2 ago, I was working on my boat sealing a leaking mast collar. I grabbed the lifelines to help me get up, and water ran out from under the stanchion base. Hmm, not good. So I checked it's neighbor; same thing, give it a sideways pull and water comes out from under the base. All the rest were OK.
Today was the first decent day since, so I drove down to re-bed the 2 leakers. It's rained a lot in between, and when I gave each a pull a LOT of water came out, enough to run down the deck and out the scupper, probably 1/4 cup in each. Strange:confused:. When I removed the stanchions, I could see the culprit. The tube looks like it's welded to the base plate, but actually goes through a hole in the base. Evidently water gets into the vertical tube where the lifelines pass through it, and collects at the bottom. I'd expect there to be a weep hole, but there isn't, so I guess the water has been collecting in there for some time.
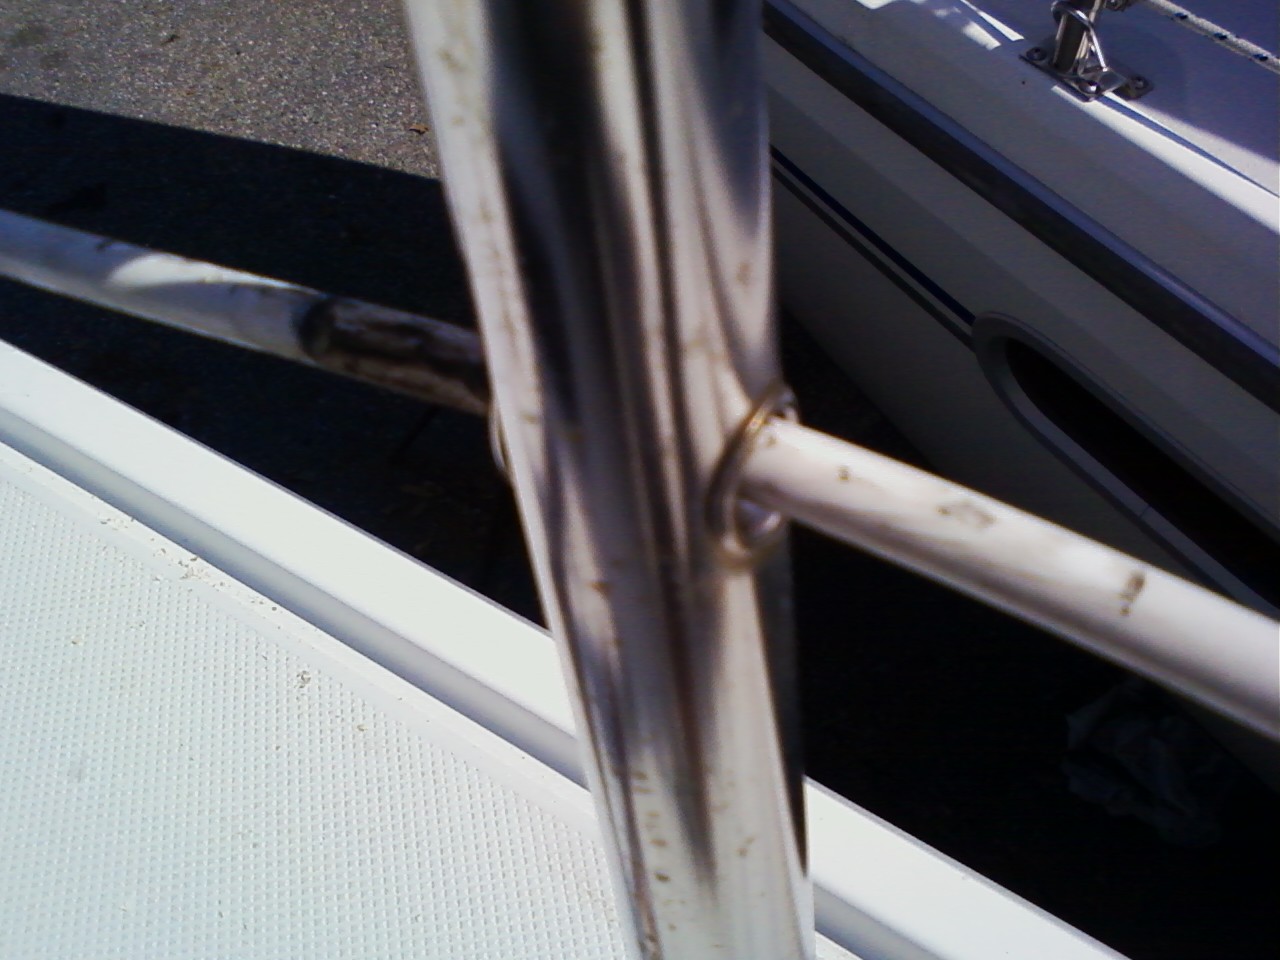
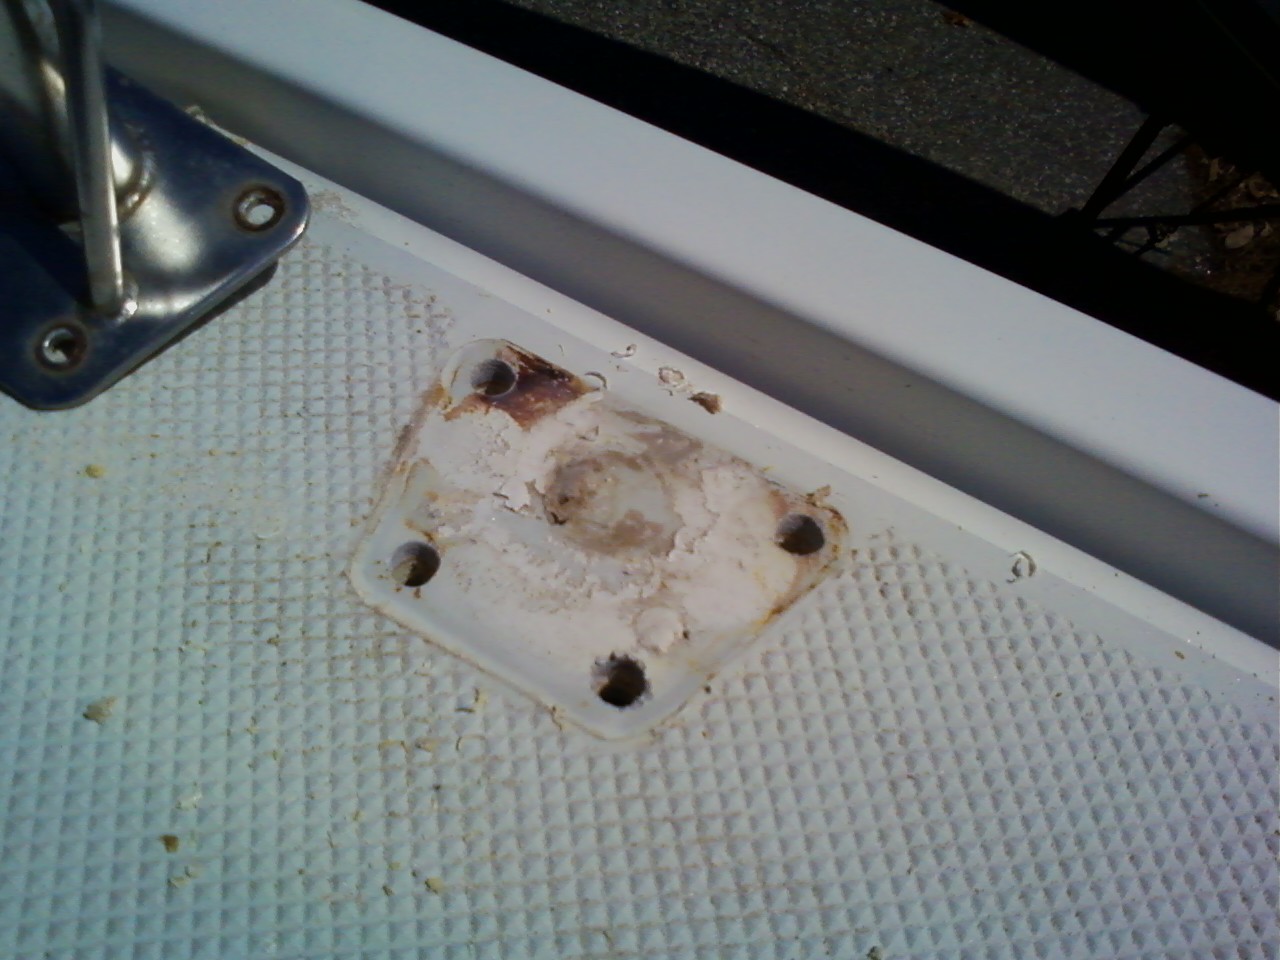
The attached pics show where the stanchion was removed; the dark spots obviously had water intrusion. I tried a close up of where the lifeline goes through the tube, but not a great pic. I haven't thought of a clean way to seal them up. And I guess I'll have to drill a weep hole in each:mad:; always fun trying to drill stainless.
At any rate, I followed the procedure laid out by mainsail to re-bed with butyl tape. Fortunately, the core was bone dry, nothing but dry chips when I drilled out the holes. Whoever bedded them at Catalina in '97 used a lot of white caulk, probably polysulfide as it was still pliable. And came off with acetone. Filled with epoxy, redrilled, countersunk and applied the butyl tape (exciting stuff the first time, it sticks to me like epoxy:o). Supposed to really storm tonight but no worries. I'll tackle the rest over the season.
Gary and Cathy Price
1997 C36 Mk II Tall Rig/Wing Keel Imagine...
Hull # 1617
Worton Creek, Md.
Northern Chesapeake Bay
[QUOTE=plaineolde;8185]Week or 2 ago, I was working on my boat sealing a leaking mast collar. I grabbed the lifelines to help me get up, and water ran out from under the stanchion base. Hmm, not good. So I checked it's neighbor; same thing, give it a sideways pull and water comes out from under the base. All the rest were OK.
Today was the first decent day since, so I drove down to re-bed the 2 leakers. It's rained a lot in between, and when I gave each a pull a LOT of water came out, enough to run down the deck and out the scupper, probably 1/4 cup in each. Strange:confused:. When I removed the stanchions, I could see the culprit. The tube looks like it's welded to the base plate, but actually goes through a hole in the base. Evidently water gets into the vertical tube where the lifelines pass through it, and collects at the bottom. I'd expect there to be a weep hole, but there isn't, so I guess the water has been collecting in there for some time.
The attached pics show where the stanchion was removed; the dark spots obviously had water intrusion. I tried a close up of where the lifeline goes through the tube, but not a great pic. I haven't thought of a clean way to seal them up. And I guess I'll have to drill a weep hole in each:mad:; always fun trying to drill stainless.
At any rate, I followed the procedure laid out by mainsail to re-bed with butyl tape. Fortunately, the core was bone dry, nothing but dry chips when I drilled out the holes. Whoever bedded them at Catalina in '97 used a lot of white caulk, probably polysulfide as it was still pliable. And came off with acetone. Filled with epoxy, redrilled, countersunk and applied the butyl tape (exciting stuff the first time, it sticks to me like epoxy:o). Supposed to really storm tonight but no worries. I'll tackle the rest over the season.[/QUOTE]
You can also drill a small drain hole through the low side of the stanchion just above the weld. This will prevent water from accumulating in there.
Keep in mind that these stanchion bases flex tremendously and is why the countersinking of the holes is so important.
Here's a 2 year old production boat where the bedding has failed between the stanchion base and deck. The drain hole is visible though. The deck was already reading high moisture to about 4" away from the stanchion.
[IMG]http://www.pbase.com/mainecruising/image/129651453.jpg[/IMG]
-Maine Sail
https://www.marinehowto.com/
[QUOTE=Maine Sail;8198]You can also drill a small drain hole through the low side of the stanchion just above the weld. This will prevent water from accumulating in there.
Keep in mind that these stanchion bases flex tremendously and is why the countersinking of the holes is so important.
Here's a 2 year old production boat where the bedding has failed between the stanchion base and deck. The drain hole is visible though. The deck was already reading high moisture to about 4" away from the stanchion.
[/QUOTE]
Thanks. That's what I meant when I referred to 'weep holes'; guess 'drain holes' is more accurate. Any advise on drilling them? I've found stainless difficult to drill under any circumstances, trying to do it with an approx. 1/8" bit should add to the excitement. I don't want water trapped in there; I'm surprised it never 'burst' the tube by expanding when in freezes.
Is it common practice for the verticle 'pipe' to go through a hole in the base plate? I was surprised to find that, figuring it would a) add to the cost, b) weaken the base plate, and c) allow any water that gets into the tube to collect between the base plate and deck.
The deck, including the liner, is about 1" thick below the stanchions, with about a 1" fender washer. Is it worth making 1/4" aluminum backing plates?
Thanks greatly for your excellent article on re-bedding and for posting a source for the butyl tape; I couldn't find it anywhere.
Gary and Cathy Price
1997 C36 Mk II Tall Rig/Wing Keel Imagine...
Hull # 1617
Worton Creek, Md.
Northern Chesapeake Bay
Drilling stainless;
Go SLOW, do not STOP until the hole is done, use a cutting oil.
By drilling slow, and I mean very slow as it barely turning, you will keep the bit and stainless cooler. Stainless work hardens very easily so if you drill you heat it up and if you stop in the middle of the process your done for. When you start again the stainless is now highly hardened and will chew through drill bits like a dog on raw meat.
-Maine Sail
https://www.marinehowto.com/
I see compass marine has already replied...so...I wanted to give the website that has been so helpful to me. A real learning tool.
[url]http://www.pbase.com/mainecruising/boat_projects[/url]
Good luck!
Jack Bahen
Kinera - 1985 C36 Mk I Tall Rig
Hull # 422
Annapolis, MD
Gary,
If you have the ability to do so, it is DEFINITELY worth it to make and install 1/4" aluminum backing plates! Backing plates, combined with Maine Sail's method of bedding the stanchions, will be a huge improvement.
Tom Sokoloski
C36/375IA Past Commodore
Noank, CT